June 4, 2026 • Doug Porter • 9 min reading time • Prices verified June 25, 2026
Copy-Stand Digitizing: The DSLR Method That Beats Most Dedicated Scanners for Speed
That box of slides your parent left behind — the carousel labeled “Summer 1973” in faded marker — represents moments that exist nowhere else. No backup, no duplicate. If they fade to nothing or get lost in a move, they’re simply gone. Digitizing them is the act that changes that. And if you’ve already looked into dedicated film scanners (purpose-built hardware that uses a light source and sensor to read film frame by frame), you’ve probably noticed a problem: a flatbed scanner like the Epson V850 Pro does beautiful work, but it can take four to eight minutes per frame at full resolution. A box of 200 slides becomes a multi-day project. There’s another path — one that uses a camera you may already own, a macro lens (a specialized close-focusing lens that lets a camera reproduce small subjects at life size), and a copy stand (a vertical column with a horizontal arm that holds the camera steady, pointed straight down). Done right, this method can digitize the same 200 slides in a single afternoon, at quality that rivals or beats most dedicated scanners under $700.
This guide is for the reader who already knows what a RAW file is and has probably held a scanner before. We’ll get into the real tradeoffs — resolution math, color accuracy, workflow bottlenecks, and the specific gear decisions that separate a frustrating setup from one you’ll actually use.
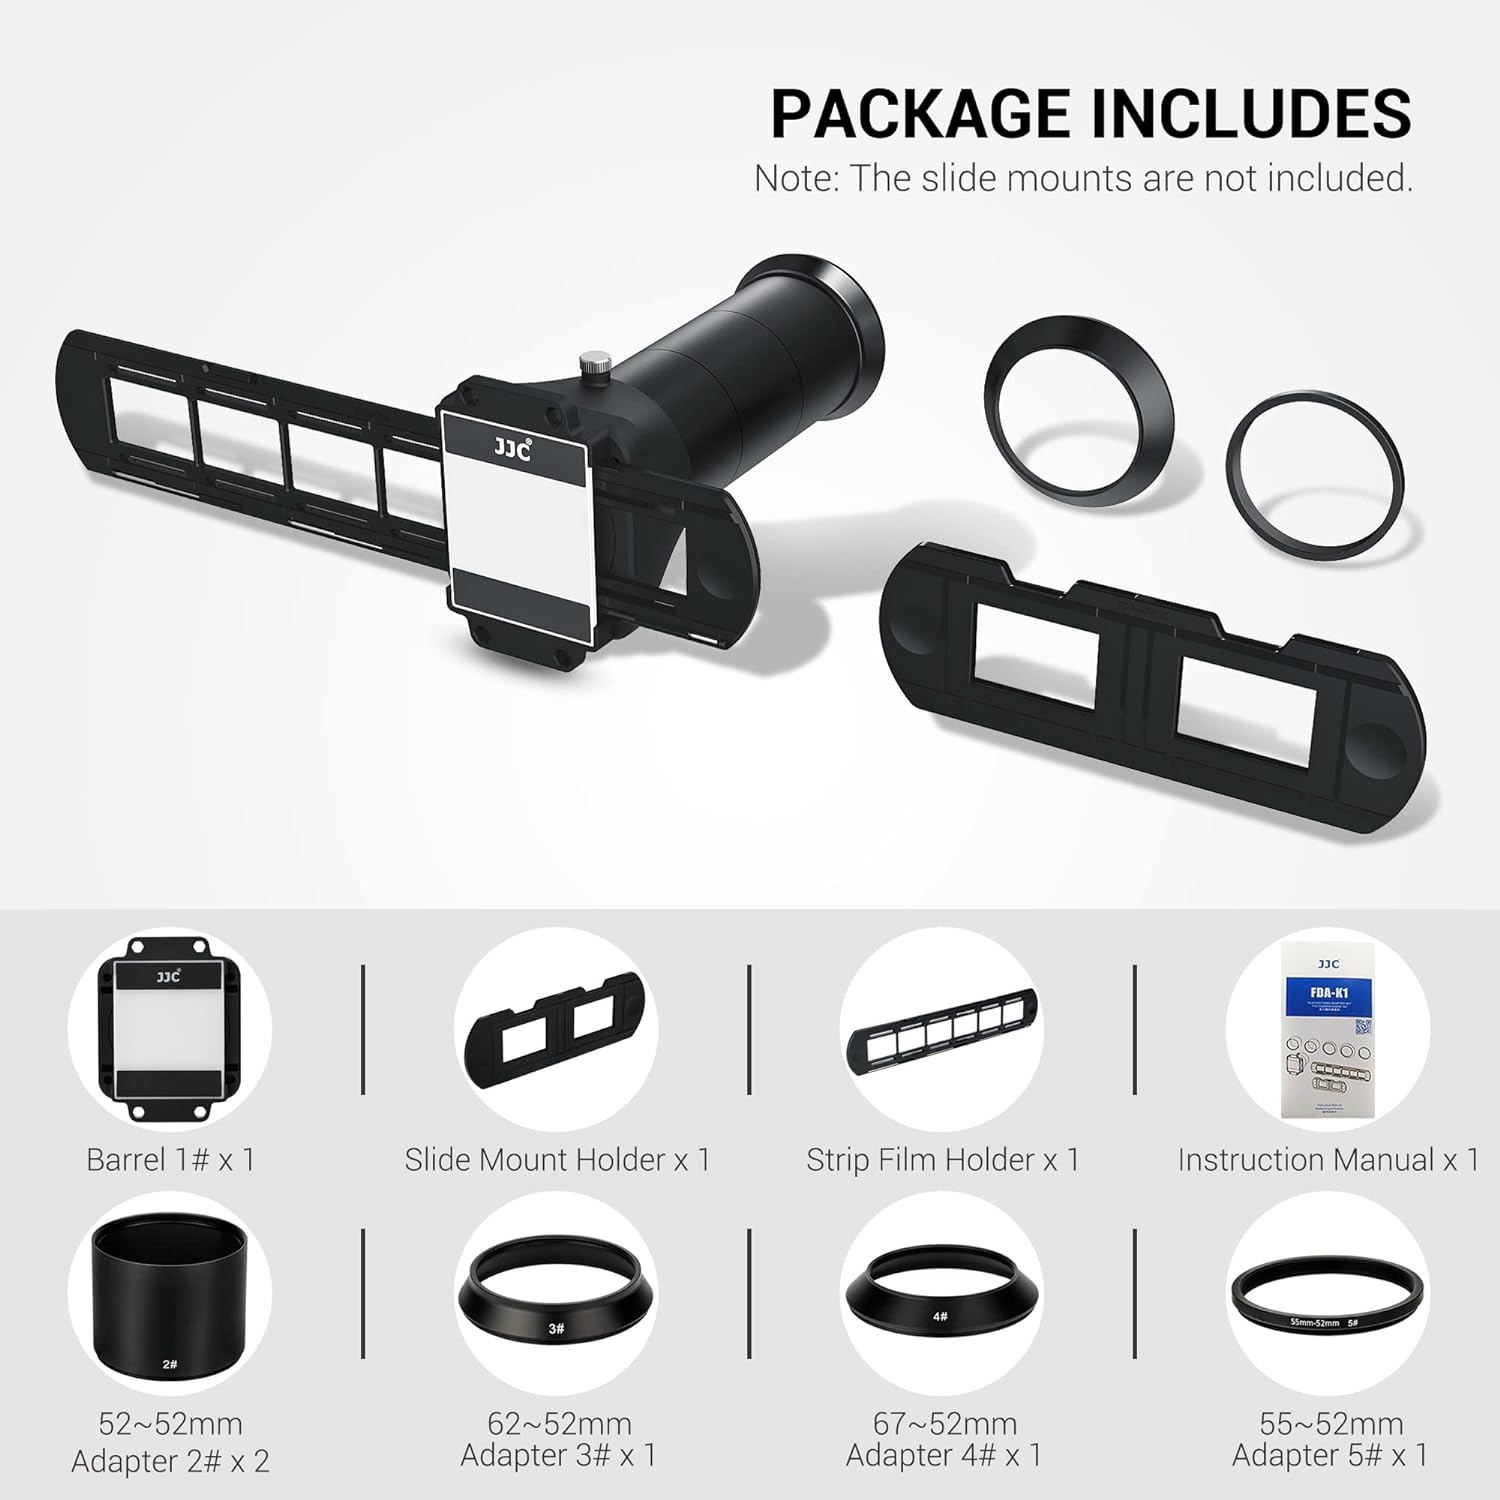
| EDITOR'S PICK[JJC Slide and Film Digitizing A](https://www.amazon.com/dp/B09SLS42TW?tag=greenflower20-20)… | Mid-tier[JJC ES-2 Film Digitizing Adapte](https://www.amazon.com/dp/B0DX71XP91?tag=greenflower20-20)… | Budget pick[Photomyne A4 Slide Viewer](https://www.amazon.com/dp/B08X6W9PYV?tag=greenflower20-20) | |
|---|---|---|---|
| Size | — | — | A4 |
| Backlight | ✗ | ✗ | ✓ |
| Adapter Ring | ✓ | ✓ | — |
| Price | $55.19 | $55.19 | $24.99 |
| See on Amazon → | See on Amazon → | See on Amazon → |
Why Camera Scanning Outpaces Flatbed Scanners on Speed
The bottleneck in flatbed scanning is mechanical: the scan head moves across the film in a slow, precise crawl, capturing data in strips. A dedicated film scanner like the Plustek OpticFilm 8300i Ai is faster for 35mm than a flatbed, but it’s still single-frame, single-load. Dust removal via infrared (ICE or similar technology — a second infrared light pass that maps dust and scratches digitally) adds another processing pass on top.
A camera capture is essentially instantaneous. Once your light source is on and your camera is locked in place, capturing a single frame of 35mm film takes a fraction of a second. The real time cost shifts to the workflow around the capture: loading film strips into a holder, checking focus, and the post-processing in software like Lightroom or Capture One. That post work is real, but it’s parallelizable — you can batch-process a whole session overnight while you sleep.
By the numbers:
- Flatbed scanner (Epson V850 Pro, 35mm film at 4800 ppi optical): ~4–8 minutes per frame
- Dedicated 35mm scanner (Plustek OpticFilm 8300i Ai, with infrared dust removal): ~2–4 minutes per frame
- Camera scan (mirrorless + macro lens + DSLR film holder): ~10–30 seconds per frame, including advance and check
- Throughput advantage at 200 frames: camera scanning saves roughly 8–25 hours of active scanner time
Those numbers come from comparative timing data cited in filmscanner.info’s technical comparison of scanning methods and are consistent with workflow reports aggregated by photopxl.com’s camera-scanning coverage.
What Gear You Actually Need (And Where People Over-Spend)
The Camera Body
Any modern mirrorless or DSLR body with at least 24 megapixels will exceed the effective resolution of most dedicated film scanners under $500. Here’s the math that matters: a 45-megapixel sensor (like the Sony A7R V or Nikon Z8, both hovering around $3,000–$3,500 body-only in mid-2026) resolves approximately 8,000 pixels on the long axis. A 35mm frame is 36mm wide. At 1:1 macro reproduction, that yields roughly 5,600 DPI effective — far above the optical (not marketing) resolution of a flatbed scanner. Imaging-resource.com’s sensor resolution analysis has consistently shown that marketing DPI figures from scanner manufacturers refer to interpolated values, not optical resolving power; actual optical performance on most flatbeds tops out around 2,400–3,200 DPI.
But you don’t need the flagship. A 24-megapixel body — the Sony A7 III, Canon R8, Fuji X-T5, Nikon Z5 II, all in the $1,000–$2,000 range — delivers approximately 4,000 DPI equivalent and will outresolve most films’ actual grain structure. The practical ceiling on 35mm film grain is around 4,000–6,000 DPI according to filmscanner.info’s grain frequency data. More resolution is only meaningful on medium format or large format film.
Decision rule: If you’re digitizing 35mm or 120 medium format: 24 megapixels is the floor, 45 megapixels is the ceiling of what you’ll use. For 4×5 large format: 60+ megapixels starts to justify itself.
The Macro Lens
This is the gear decision that matters most. A macro lens is designed to focus close enough that the subject fills the frame — for film digitizing, you want 1:1 reproduction (one-to-one, meaning the film frame is reproduced at actual size on the sensor). The focal length determines working distance: a 60mm macro on a crop-sensor body gives you very little clearance between lens and film; a 100mm or 105mm macro gives comfortable room for your light source and film holder.
Options reviewed regularly at B&H Photo and luminous-landscape.com include:
- Canon RF 100mm f/2.8L Macro IS (~$1,100) — praised by reviewers for its 1.4:1 maximum magnification and outstanding corner sharpness
- Nikon Z MC 105mm f/2.8 VR S (~$900) — consistently rated as optically excellent with smooth focus throw for fine adjustments
- Sony FE 90mm f/2.8 Macro G OSS (~$1,100) — longtime benchmark in the Sony ecosystem, well-reviewed for flat-field rendering (critical for film, which must be reproduced as a flat plane)
- Sigma 105mm f/2.8 EX DG OS HSM Macro (~$500–$600 used) — a cross-system option that owners in long-run reviews note performs nearly as well at a significant discount
Flat-field performance is the key spec: a lens that renders a flat subject (film) sharp edge to edge without vignetting or field curvature. Most purpose-built macro lenses do this well; adapted vintage bellows lenses can be optically excellent but require more setup effort.
The Copy Stand and Film Holder
A copy stand is simply a column and a horizontal arm with a camera mount. You want one that’s heavy enough not to vibrate when you press the shutter, with enough vertical travel to frame different film formats. The Kaiser RS 10 copy stand ($350) and the Neewer aluminum copy stand ($80–$120) represent opposite ends of the quality spectrum; reviewers at B&H Photo note the Kaiser holds significantly steadier, which matters for fine-detail capture at 1:1.
The film holder is equally critical and often overlooked. Film curls. A curled negative held at the center of the frame will be out of focus at the edges. Dedicated camera-scanning film holders — products like the VALOI easy35 system or the Negative Supply Basic Holder — are designed to flatten film with gentle tension and integrate with a diffusion light source underneath. The VALOI system in particular has accumulated strong reviews from film photographers on its film-handling quality (per photopxl.com’s camera scanning overview). Without a proper holder, you’ll spend more time fighting focus inconsistency than you save over a flatbed.
The Light Source
You need a diffuse, color-accurate light source behind the film — think of it as the “lamp” in a scanner, except you supply it. LED light pads designed for film scanning (not general-purpose tracing pads, which often have uneven color temperature and tint) are the standard choice. The Skier Sunray Copy Box II and similar dedicated film scanning lights are calibrated for daylight color temperature (5000–5500K) and high CRI (Color Rendering Index — a measure of how accurately a light source renders colors, with 95+ being the target for critical color work). Using a generic tracing pad with a blue-green tint will bake that cast into your negatives and require significant correction in post.
Where This Method Falls Short: The Honest Tradeoffs
Color negative inversion is a real workflow burden. Scanning software like SilverFast (included with some Plustek scanners) or VueScan handles negative-to-positive inversion automatically, with film profile corrections. Camera scanning pushes that work into software like Lightroom’s camera raw tools, the free Negative Lab Pro plugin (a Lightroom plugin specifically designed for camera-scanned film inversion, ~$99), or Capture One. Negative Lab Pro has become the community standard and reviewers note it handles the orange mask in color negatives — the orange base layer in color film that prevents accurate color without correction — far better than manual inversion. But it’s a cost and a learning curve.
Infrared dust removal doesn’t exist here. This is the biggest operational gap. Dedicated scanners with ICE (Image Correction and Enhancement) technology use a separate infrared pass to detect dust and scratches, then remove them digitally. Camera scanning has no equivalent. You’re shooting through whatever is on the film, and dust removal happens manually in post. This is where the speed advantage partly erodes — budget 30 seconds to a few minutes per frame for retouching, depending on film condition.
Kodachrome and other silver-based films complicate this further. As noted throughout the restoration community and confirmed in the Library of Congress’s digital formats documentation, Kodachrome’s silver-halide structure means infrared-based dust removal fails even on dedicated scanners. For Kodachrome, the playing field is more level — neither method gives you automated dust removal.
Consistency at volume requires discipline. A flatbed scanner runs unattended. A camera scanning session requires you (or a helper) to advance film, check focus drift as film holders flex, and maintain consistent exposure. For a batch of 500+ frames, this is real operator fatigue.
Decision Rules: When to Choose Camera Scanning
If X, then Y:
-
If you need speed above all else and have a camera body already: Camera scanning is the clear choice. The incremental cost (macro lens + copy stand + film holder + light source) can come in under $500 with mid-tier choices, and the throughput gain over a flatbed is decisive at 100+ frames.
-
If you’re digitizing primarily slides (Kodachrome, Ektachrome, Velvia): Camera scanning is competitive. You still need to handle dust manually, but so does every other method on Kodachrome.
-
If your priority is hands-off, unattended batch scanning: A dedicated scanner wins. Load, press go, come back later.
-
If you’re digitizing color negatives and you hate post-processing: The Negative Lab Pro workflow is learnable but real. Budget time for it, or budget for a dedicated scanner’s built-in inversion.
-
If you’re at a boutique lab or museum team digitizing 1,000+ frames per week: The speed math almost always favors camera scanning. The one-time setup cost amortizes quickly.
Camera scanning isn’t a replacement for every dedicated scanner in every situation. But for practitioners who already own capable camera systems and are facing a backlog of film, it’s the fastest route from analog to archive — and understanding that tradeoff is the whole game.
Price references reflect market conditions as of May 2026. Verify current pricing before purchase, as sensor prices and lens availability shift frequently in the mirrorless ecosystem.